
Over the last few years the house filled up with “smart” things that don’t talk to each other: Tuya plugs, an EV charger, a solar inverter, a car with its own app, a robot vacuum, a couple of cameras and a garage door opener. Each one has its own app, its own account and its own idea of what a schedule is. Home Assistant is the usual answer to that, and this is the first post in a series about how mine went from “installed” to actually useful.
This one covers the boring but important part: the hardware, remote access, and the decision to let an AI agent do most of the configuration.
Attempt one: a Raspberry Pi 3 Model B
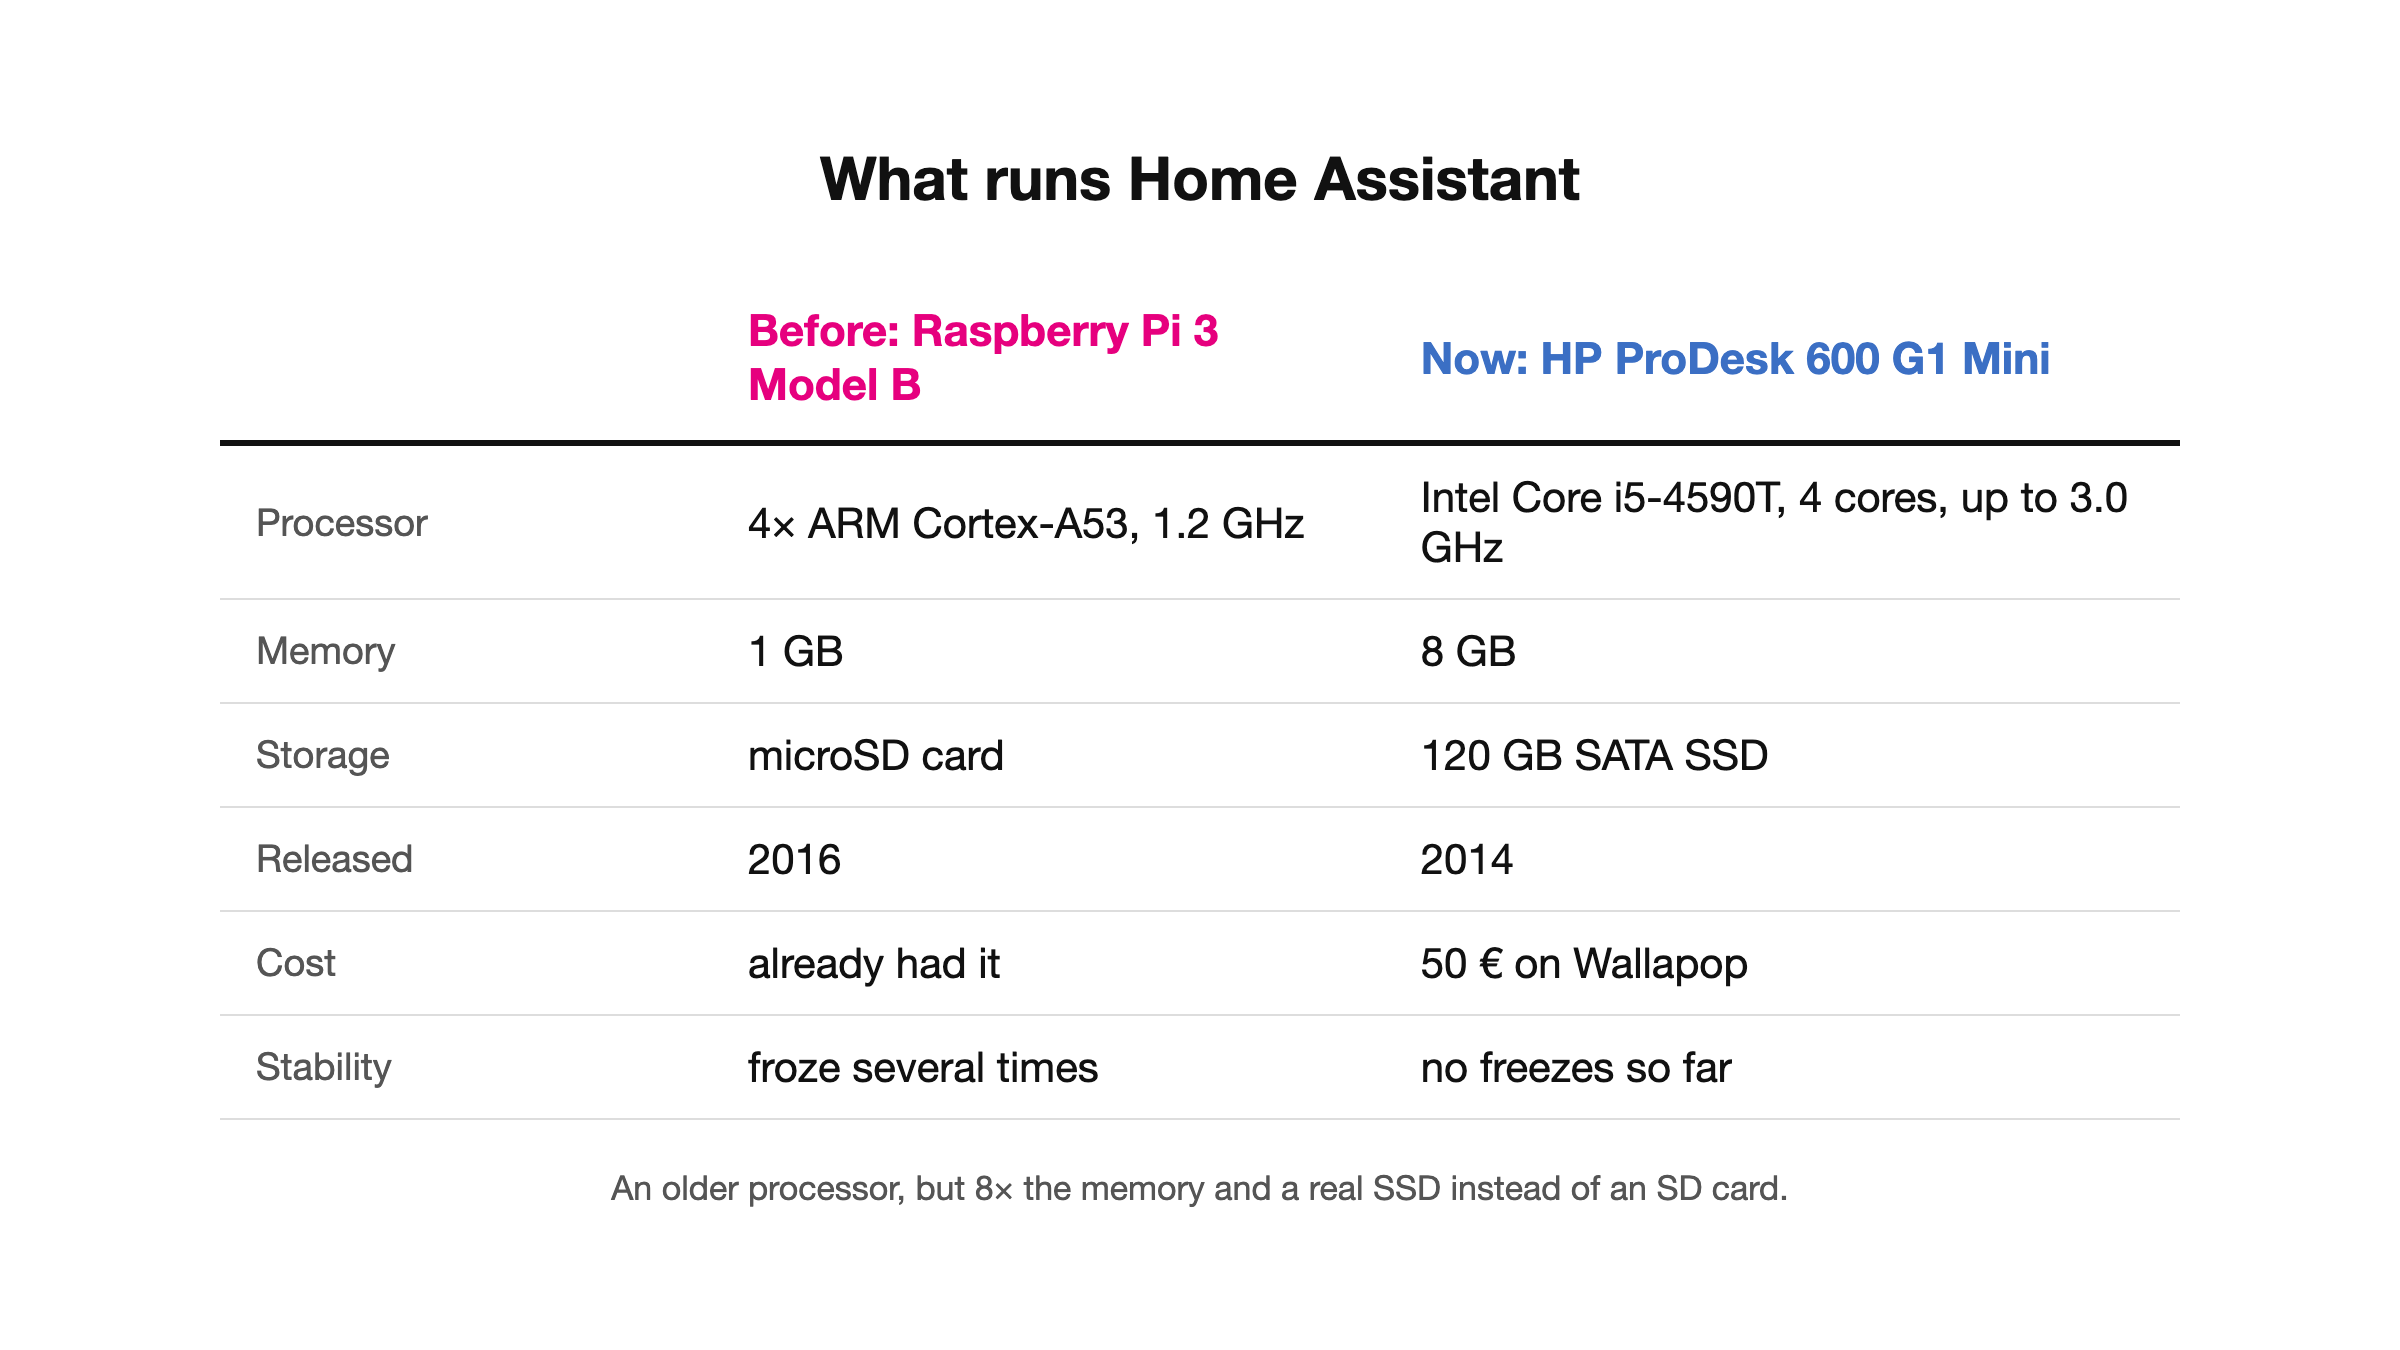
I started with what I had in a drawer: a Raspberry Pi 3 Model B. Home Assistant OS has an official image for it, so getting it running was easy. Keeping it running was not. It froze several times, the kind of freeze where the web interface stops answering and the only fix is pulling the power cable.
I didn’t spend time finding out exactly why. The usual suspects on that board are well known: 1 GB of RAM is tight for a current Home Assistant with a few integrations, and Home Assistant writes to its database constantly, which is hard on a microSD card. Either way, a home automation box you have to unplug every now and then isn’t one you can trust with a garage door.
Attempt two: a 50 € mini PC from Wallapop
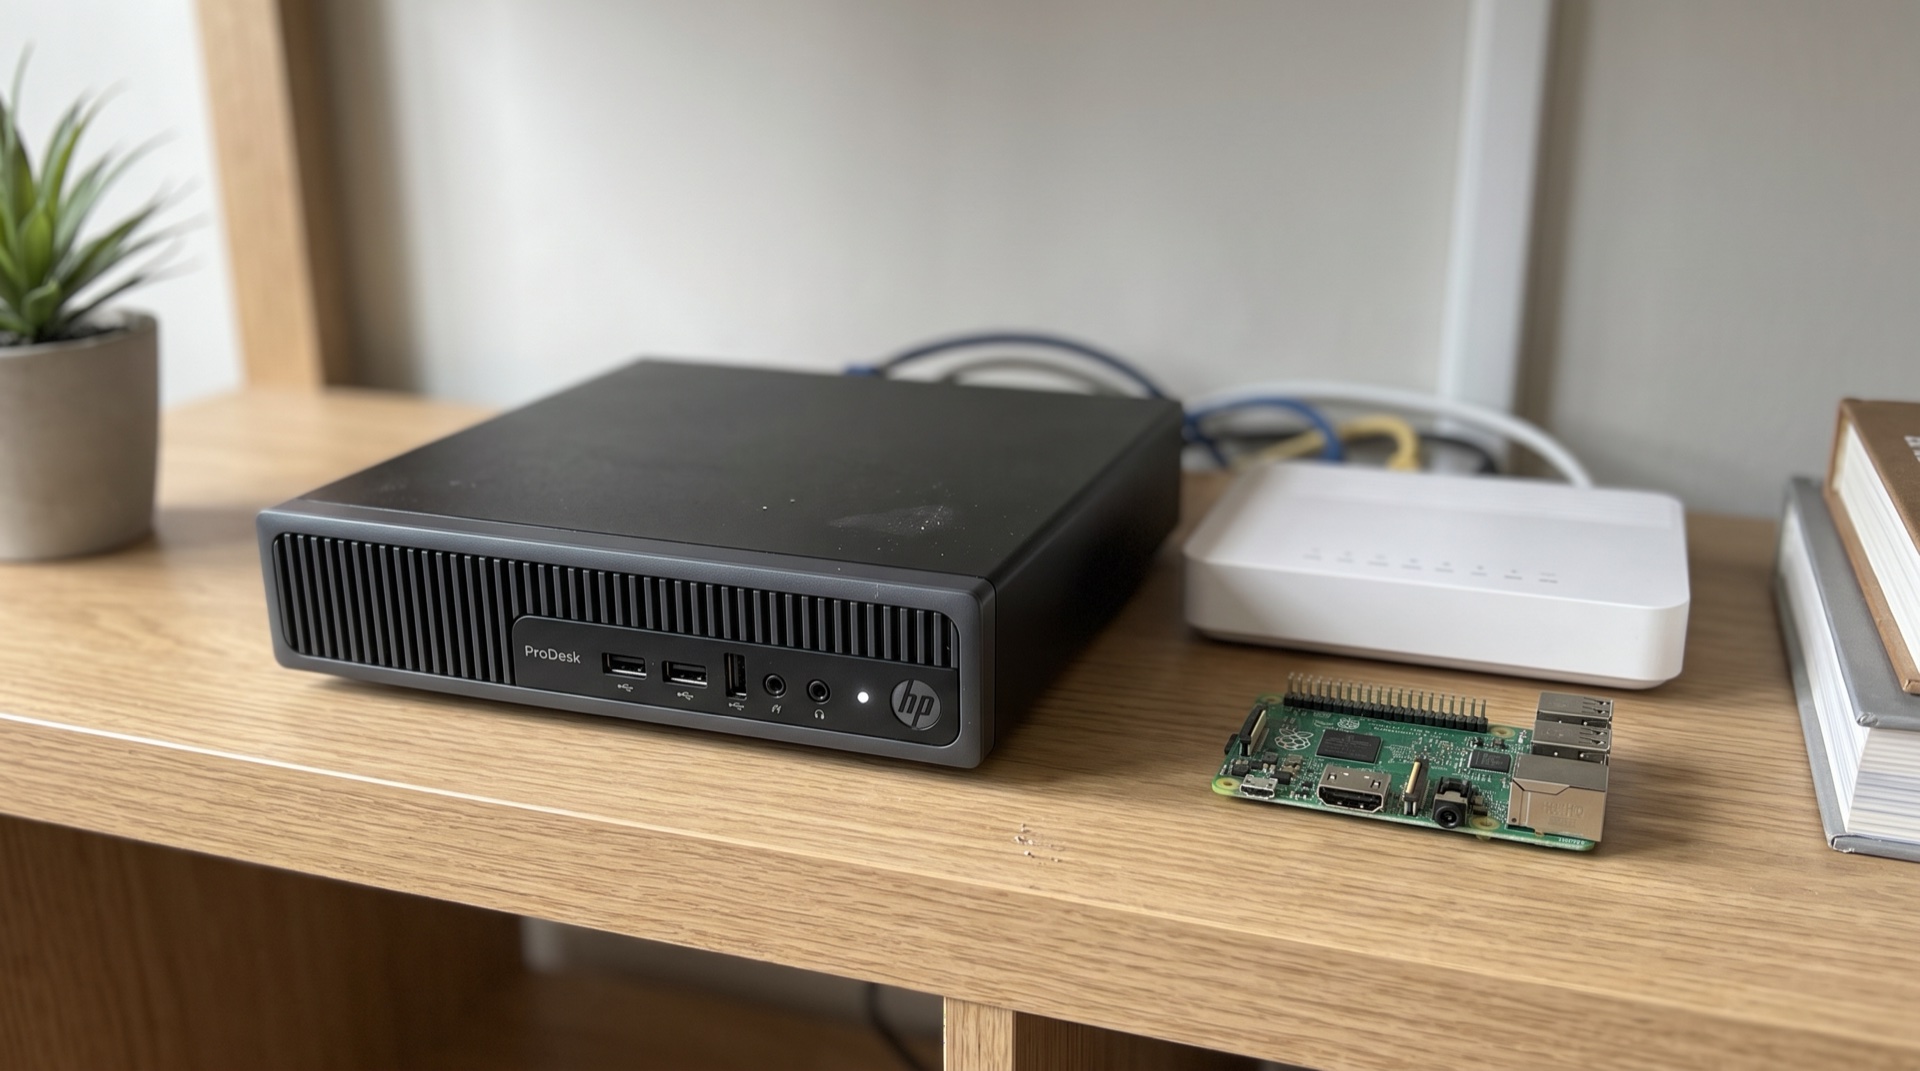
The fix was a second-hand business mini PC: an HP ProDesk 600 G1 Desktop Mini, bought on Wallapop for exactly 50 euros. These small office machines are everywhere on the second-hand market now that companies are replacing them, and they’re a great fit for this:
- an Intel Core i5-4590T, a 4-core low-power (35 W) chip from 2014,
- 8 GB of RAM, eight times what the Pi had,
- a 120 GB SATA SSD instead of a microSD card,
- small and quiet enough to sit on a shelf next to the router.
Home Assistant OS has a generic x86-64 image, so installing it is just writing that image to the SSD and booting. It has been running since without a single freeze, and most of the time it sits at a few percent of CPU.
Remote access with DuckDNS
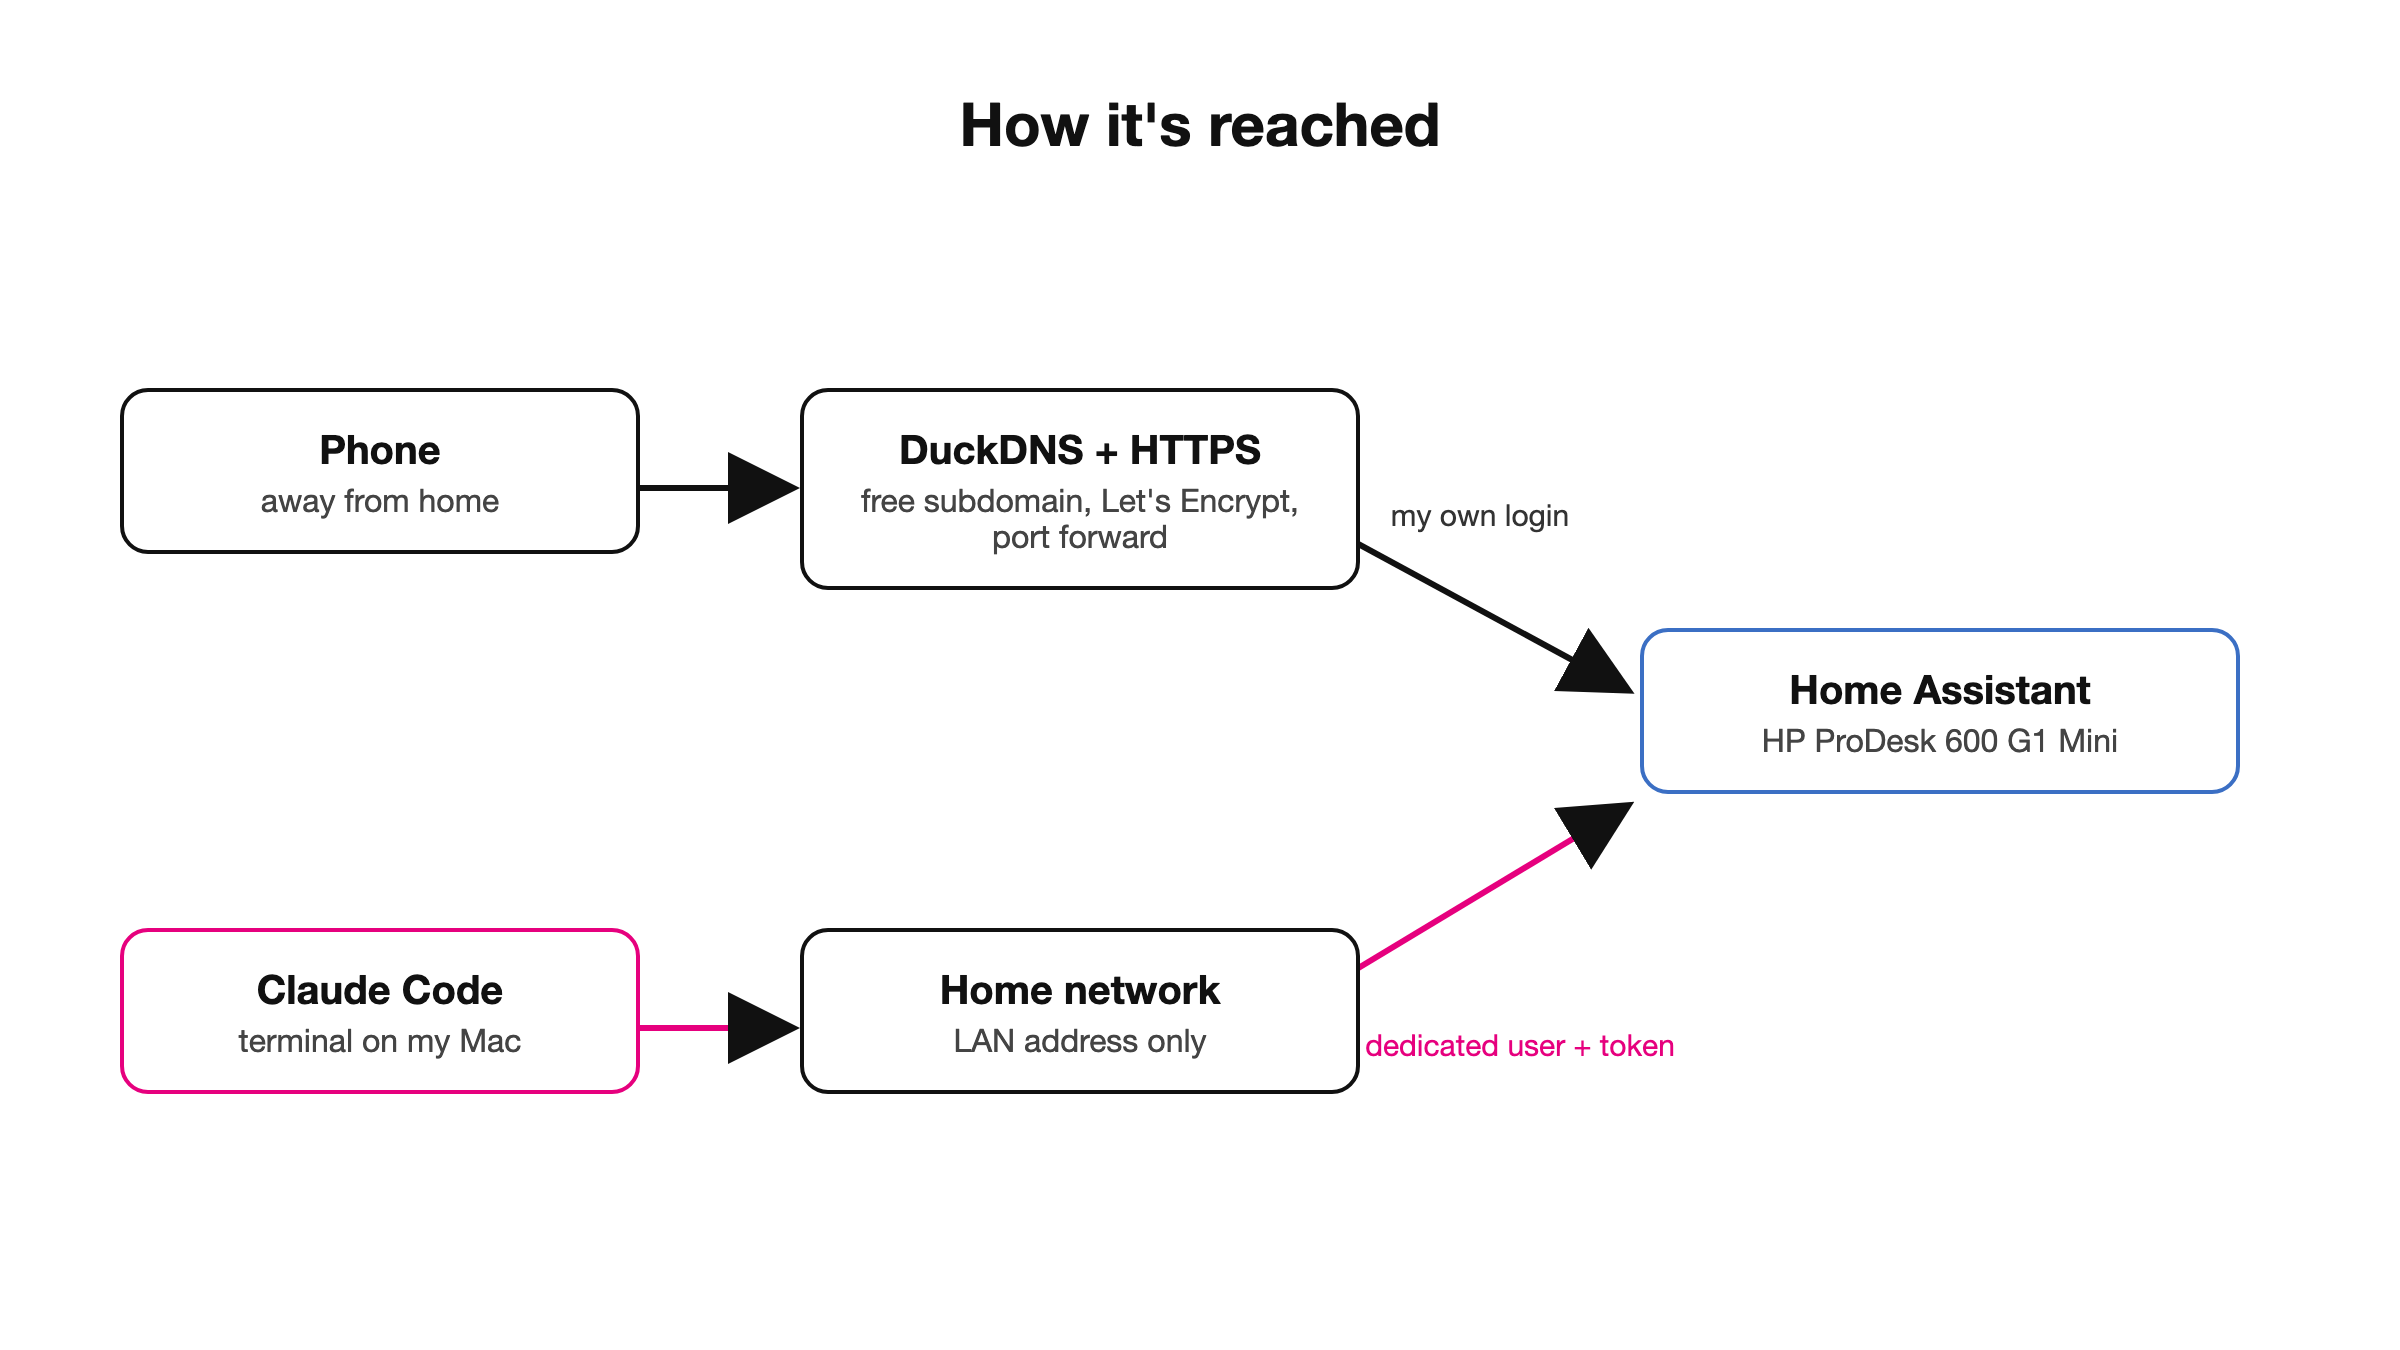
A home automation system you can only use from the sofa is half a system, so the next step was reaching it from outside. I used the DuckDNS add-on, which is the classic free option:
- DuckDNS gives you a free subdomain and the add-on keeps it pointing at your home’s public IP, which changes now and then.
- The same add-on gets and renews a Let’s Encrypt certificate, so the connection is proper HTTPS.
- A port forward on the router sends that traffic to the mini PC.
With that, the Home Assistant app on the phone works the same at home and away. The trade-off is that your instance is now on the internet, so a strong password, two-factor login and Home Assistant’s built-in IP banning after failed logins are worth switching on.
A user for Claude Code
At this point I had a stable server, remote access and 261 entities on a default dashboard that listed all of them in one long, useless column. Configuring it properly means hours of clicking and YAML, which is exactly the kind of work I don’t enjoy. So I tried something different: I let Claude Code do it, directly, as a user of my Home Assistant, from a terminal on my Mac.
The first thing I asked was how to keep that safe and reversible. The answer shaped everything else: Home Assistant has no fine-grained permissions. A user is either an administrator or not, and you need administrator rights to edit a dashboard or fix an integration. So the safety can’t come from a restricted role. It comes from habits:
- A dedicated user, allowed to log in from the local network only. Everything it does shows up in the logbook under its own name, and revoking it is one click.
- A long-lived token used against Home Assistant’s REST and WebSocket APIs over the LAN address, never the public DuckDNS one.
- A named backup before every change, plus a copy of the dashboard before each save.
- A human in the loop for anything physical. Nothing that moves the garage door gets sent unless I’m standing there.
- No third-party code on the server without my explicit approval.
What’s next
From here, most of the work was done by the agent, with me reviewing and standing next to the hardware when needed. The next posts go through the parts that were worth writing about:
- a garage door receiver that confirmed every command from the cloud and never moved the door,
- measuring a flaky Wi-Fi device before and after adding a repeater,
- cameras that stream H.265 and a mini PC that ended up at a constant 25% CPU because of them,
- a dashboard that the whole family actually understands, with electricity prices and the solar surplus,
- a shared shopping list you can fill by talking to a Google Nest.
No comments yet