
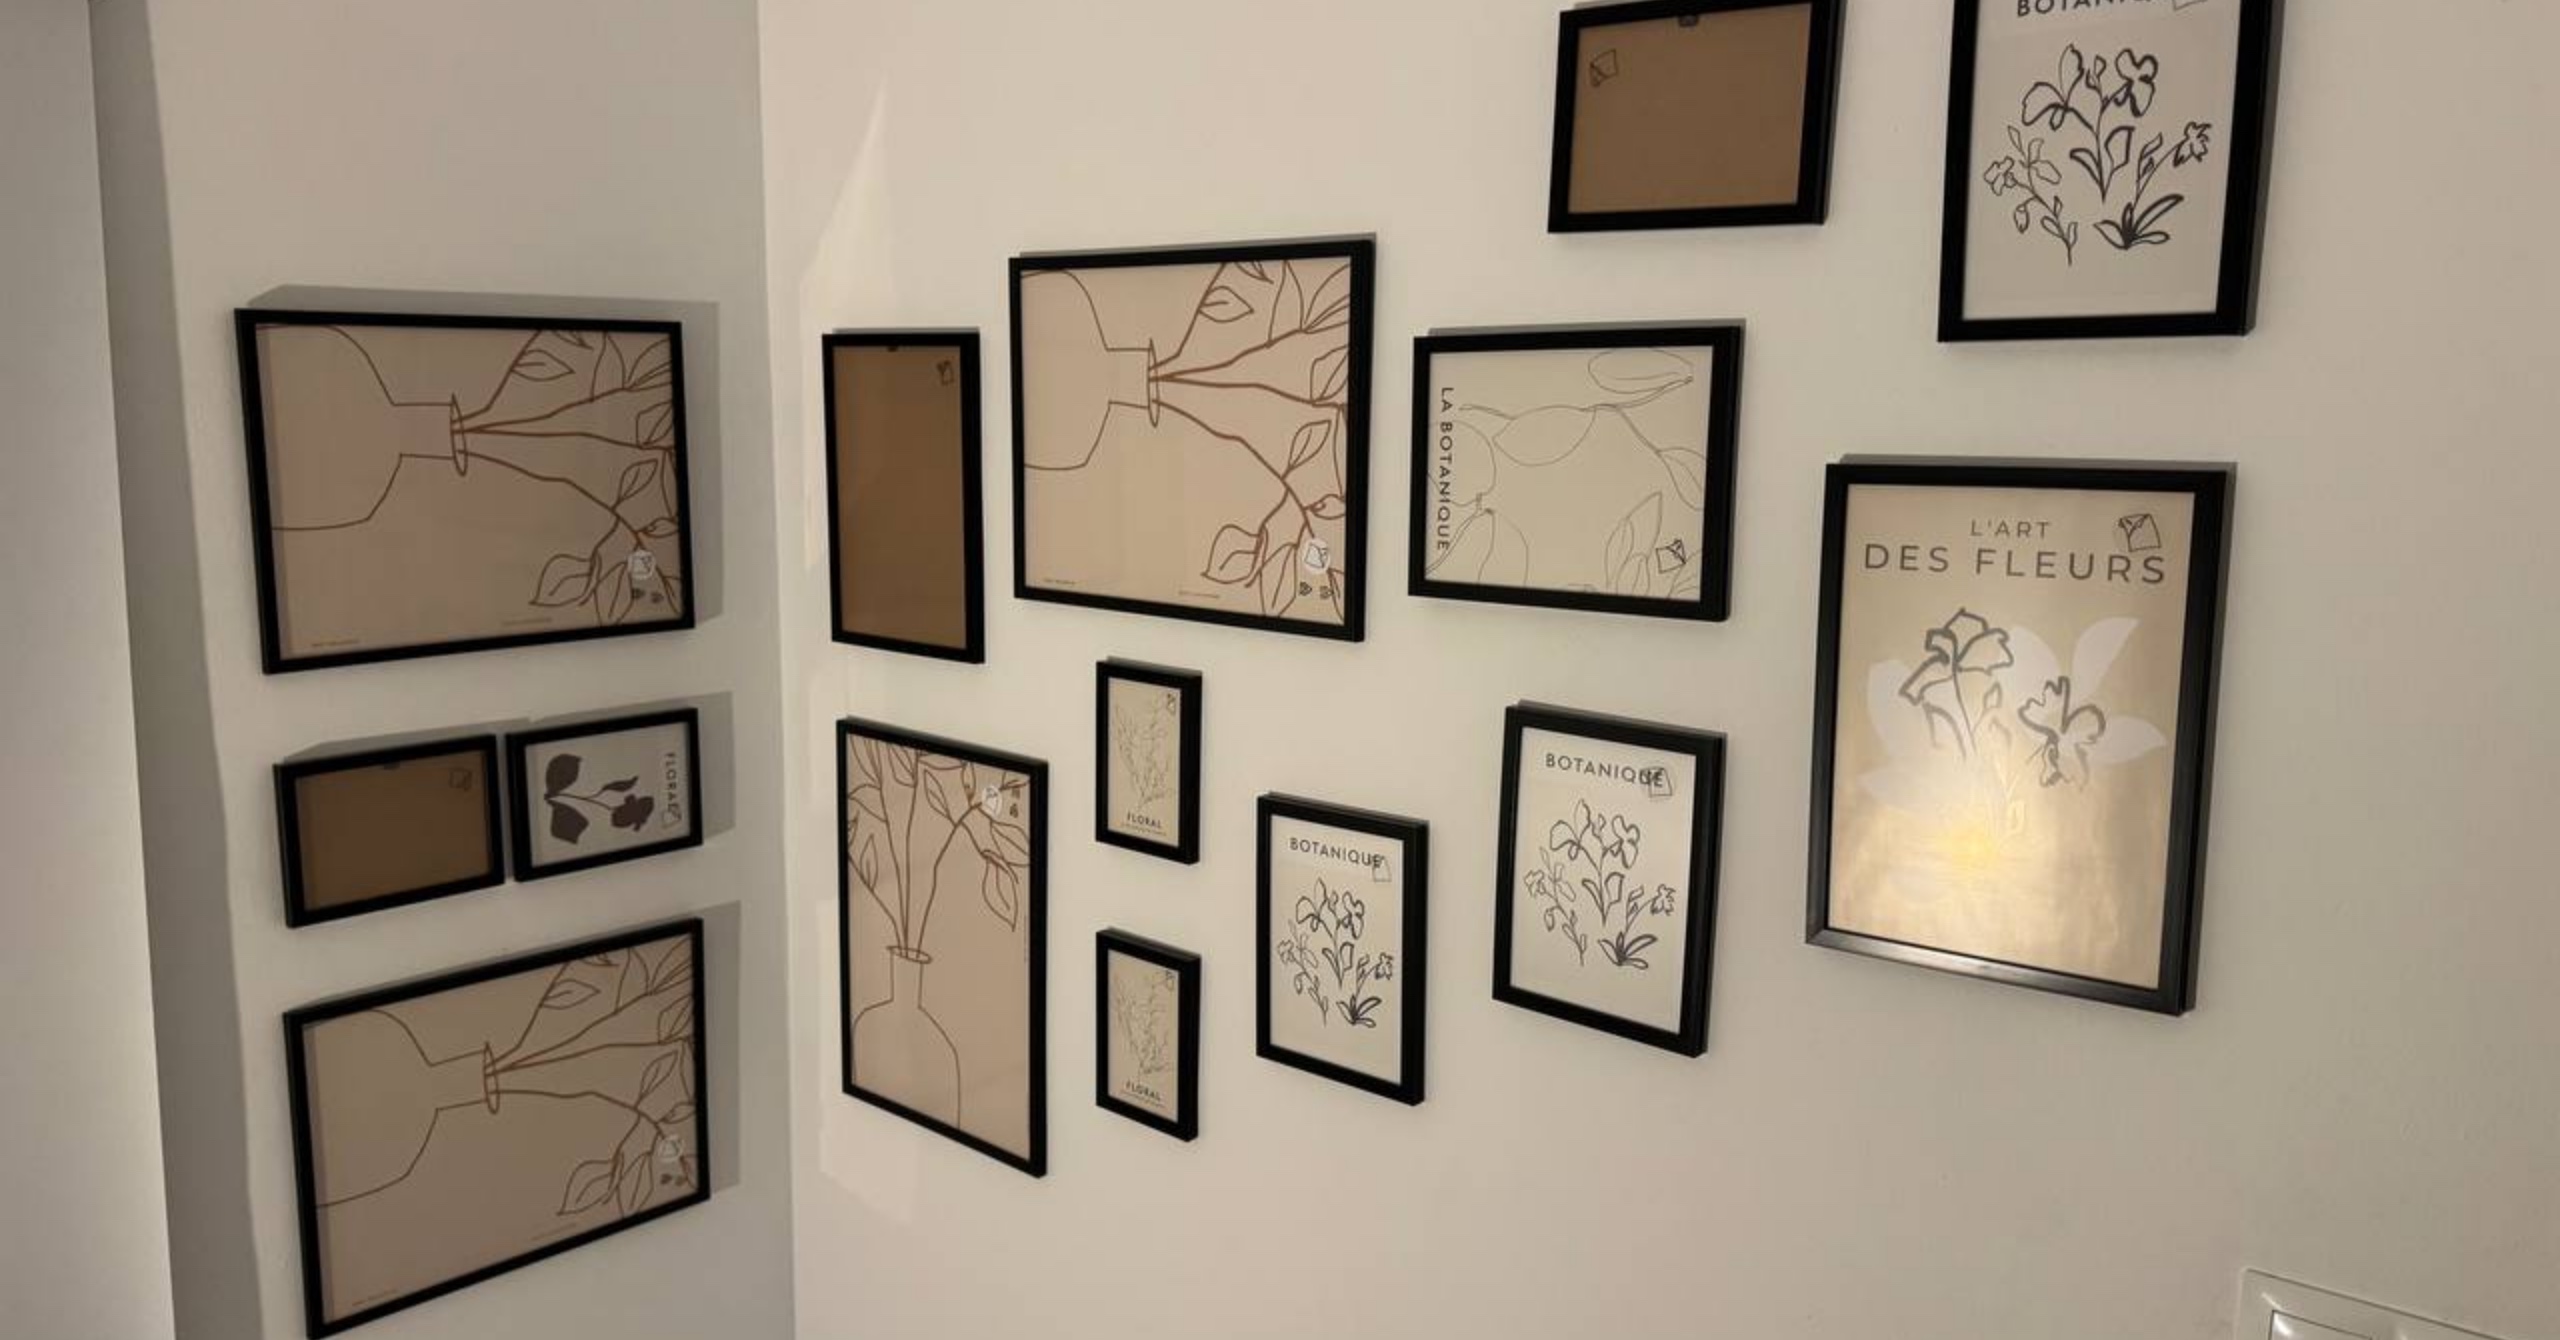
For a few weeks, 34 empty frames watched us go up and down the stairs. They came with those botanical line drawings every frame comes with, and every time I passed them I thought the same thing: these should be us. The beach in Portimão. The day the cat met the ultrasound scan. The wedding, the camels, the newborn asleep on a white shirt.
And yet nothing happened, because the question in between is harder than it sounds. Nearly 200,000 photos on our drives, ten years of them. A shortlist of about forty that we could agree on. Thirty-four frames in seven sizes, from a 10×15 you cover with your hand to a 34×50 that owns the wall. Which goes where? Hold the shortlist up to the wall one by one and you’ll be at it all weekend. Print them all and find out, and you’ll be printing twice. We needed a way to see the wall before it existed.
So I described that to Claude Code, and by the evening we had it: our stairwell, drawn to scale on a screen, with our photos inside the frames, and the two of us dragging them around with a glass of wine. This post is about what that is like, because if you have a wall of frames and a folder of photos, you can have it too.
Hang it before you print it
Here is the whole thing in one view. Four walls, every frame at its real size and position. Below them, the tray: the photos that aren’t on the wall yet.
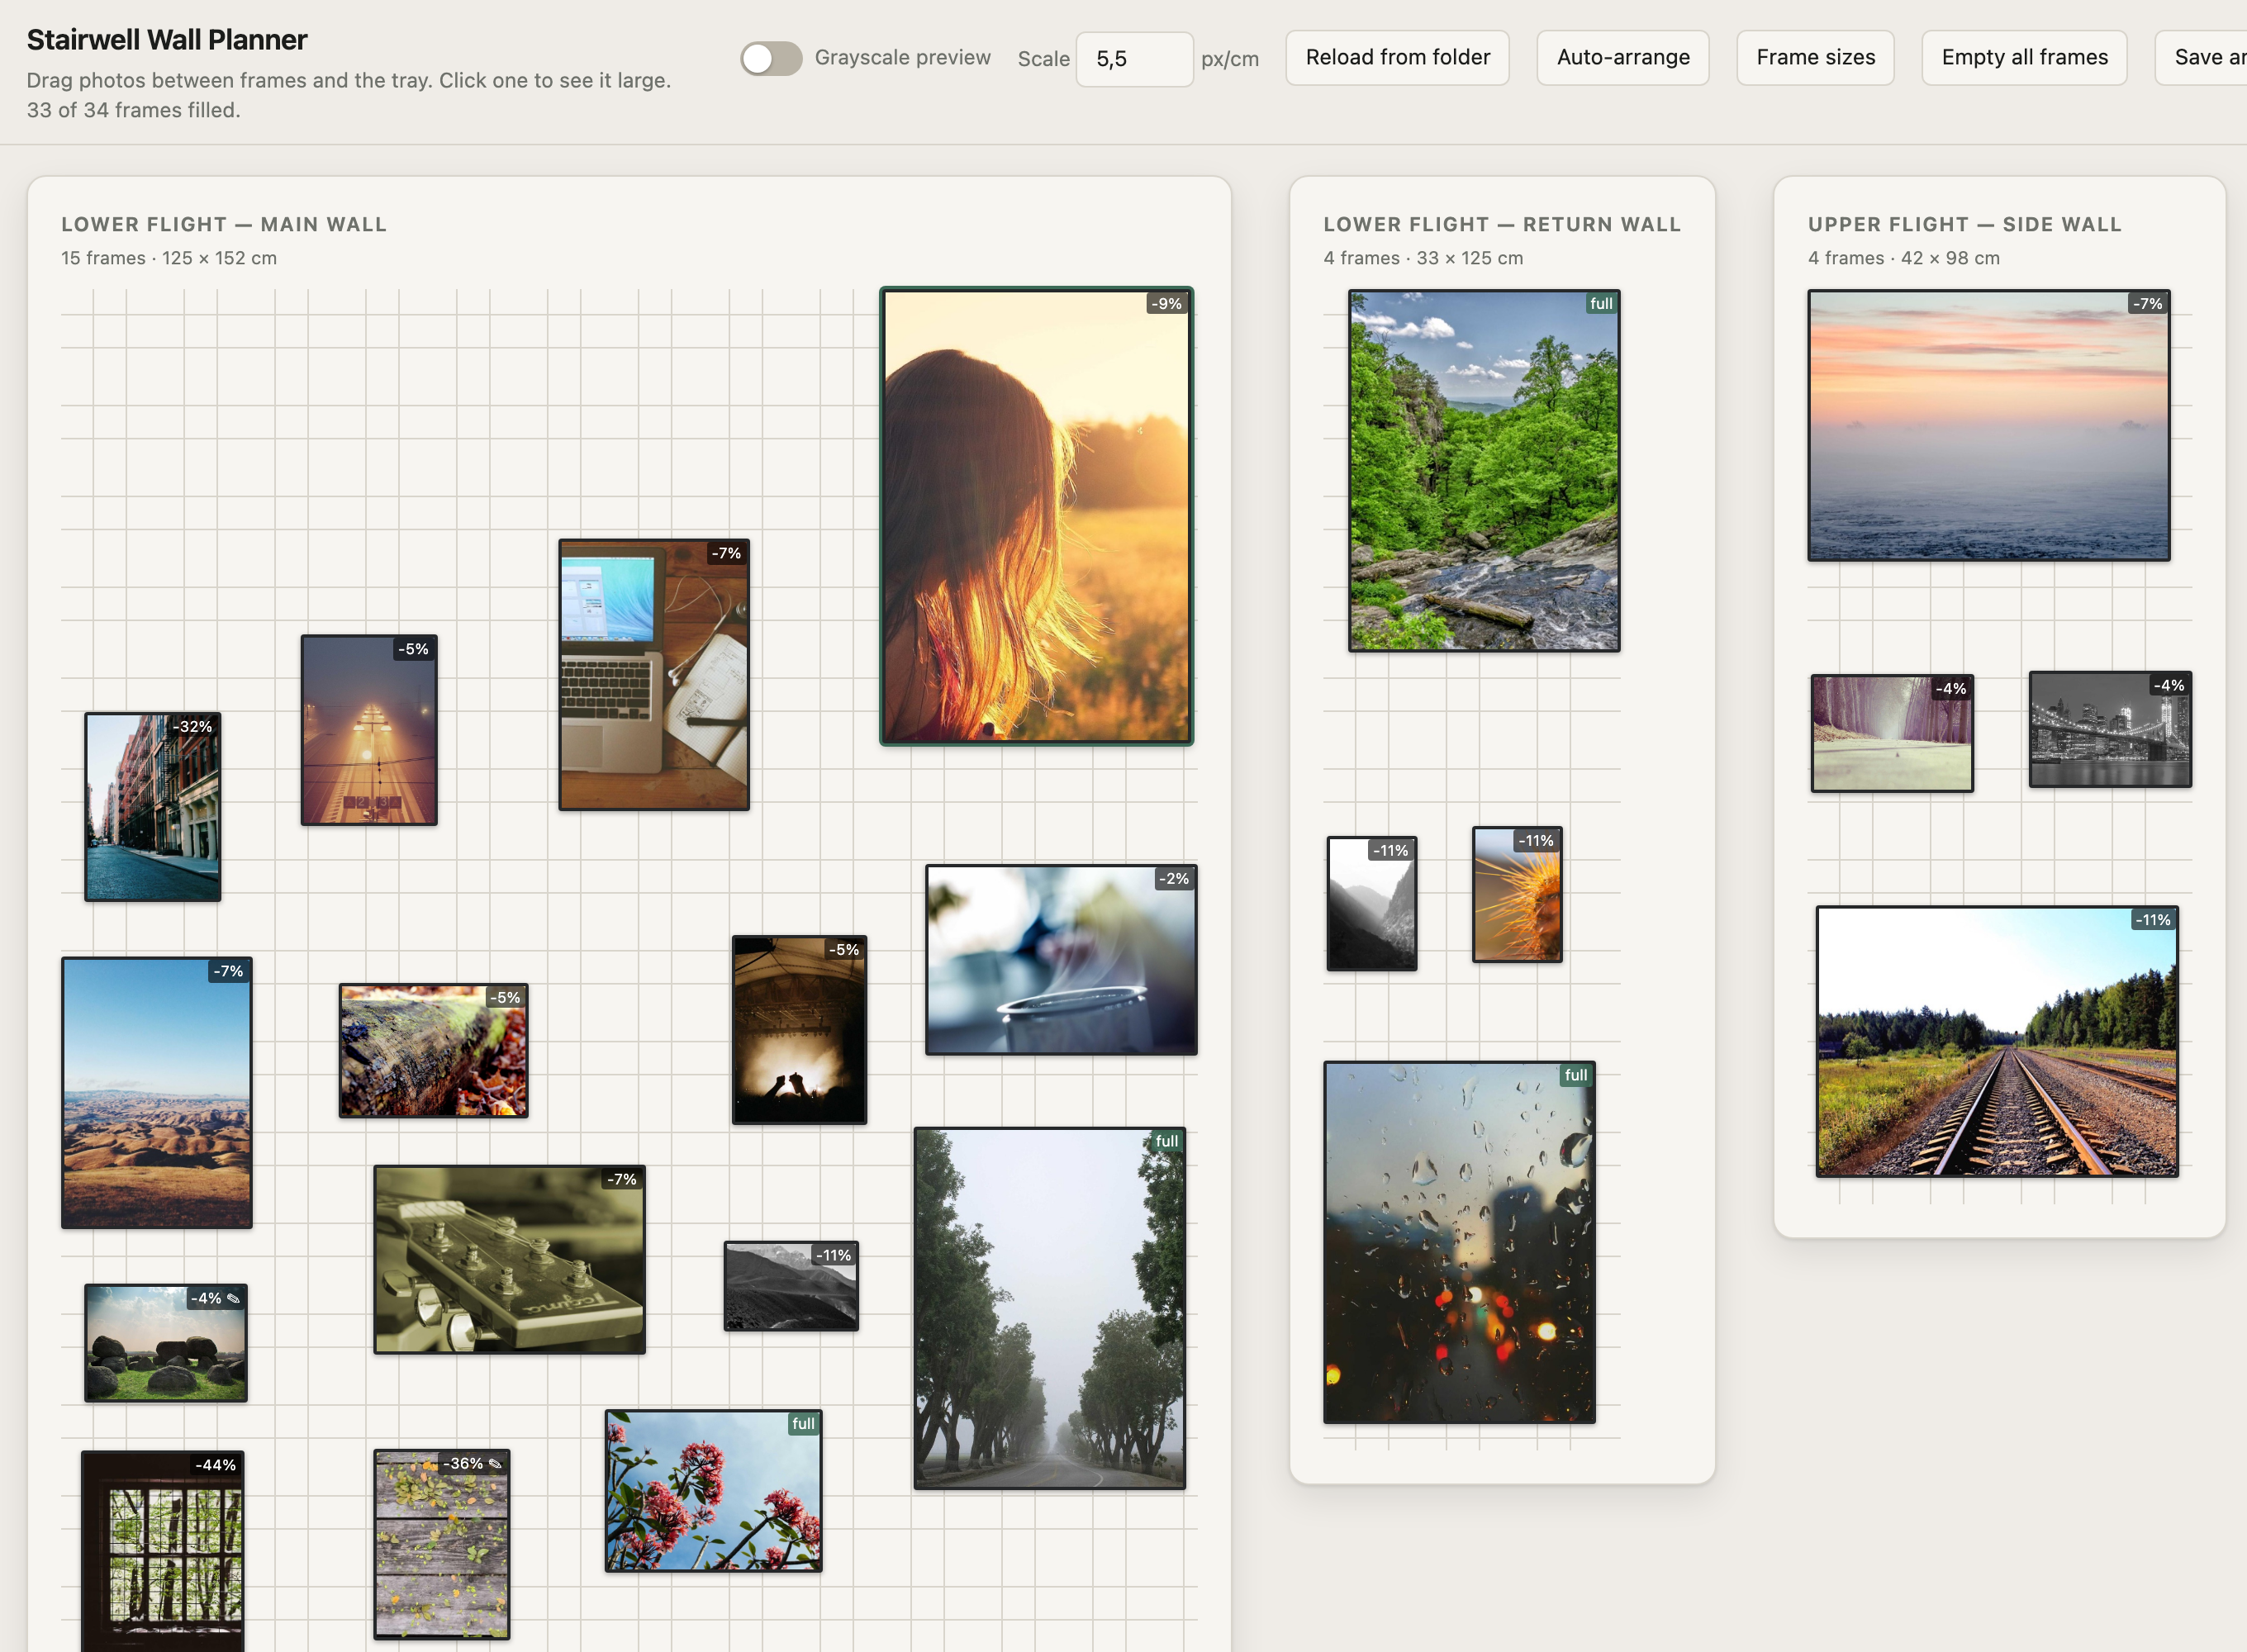
Pick a photo in the tray. Drag it up into a frame. It snaps in, already cropped to that frame’s shape. Doesn’t look right there? Drag it onto another frame and the two photos swap places. Too many good ones for the big frames? Drag one back down to the tray and think again. Want to keep a frame for that print your mother gave you? Leave it empty. The planner doesn’t mind.
Every move is instant, and every move is reversible. That is the part no amount of holding photos up to the wall can give you: the freedom to be wrong fifty times in ten minutes.
Flip one switch and see the wall
Should the wall be black and white? We went back and forth on that for weeks, in the abstract. Forty photos from ten years and three different phones, and no way to know how they’d look together in grey without printing them. In the planner it’s one switch at the top.
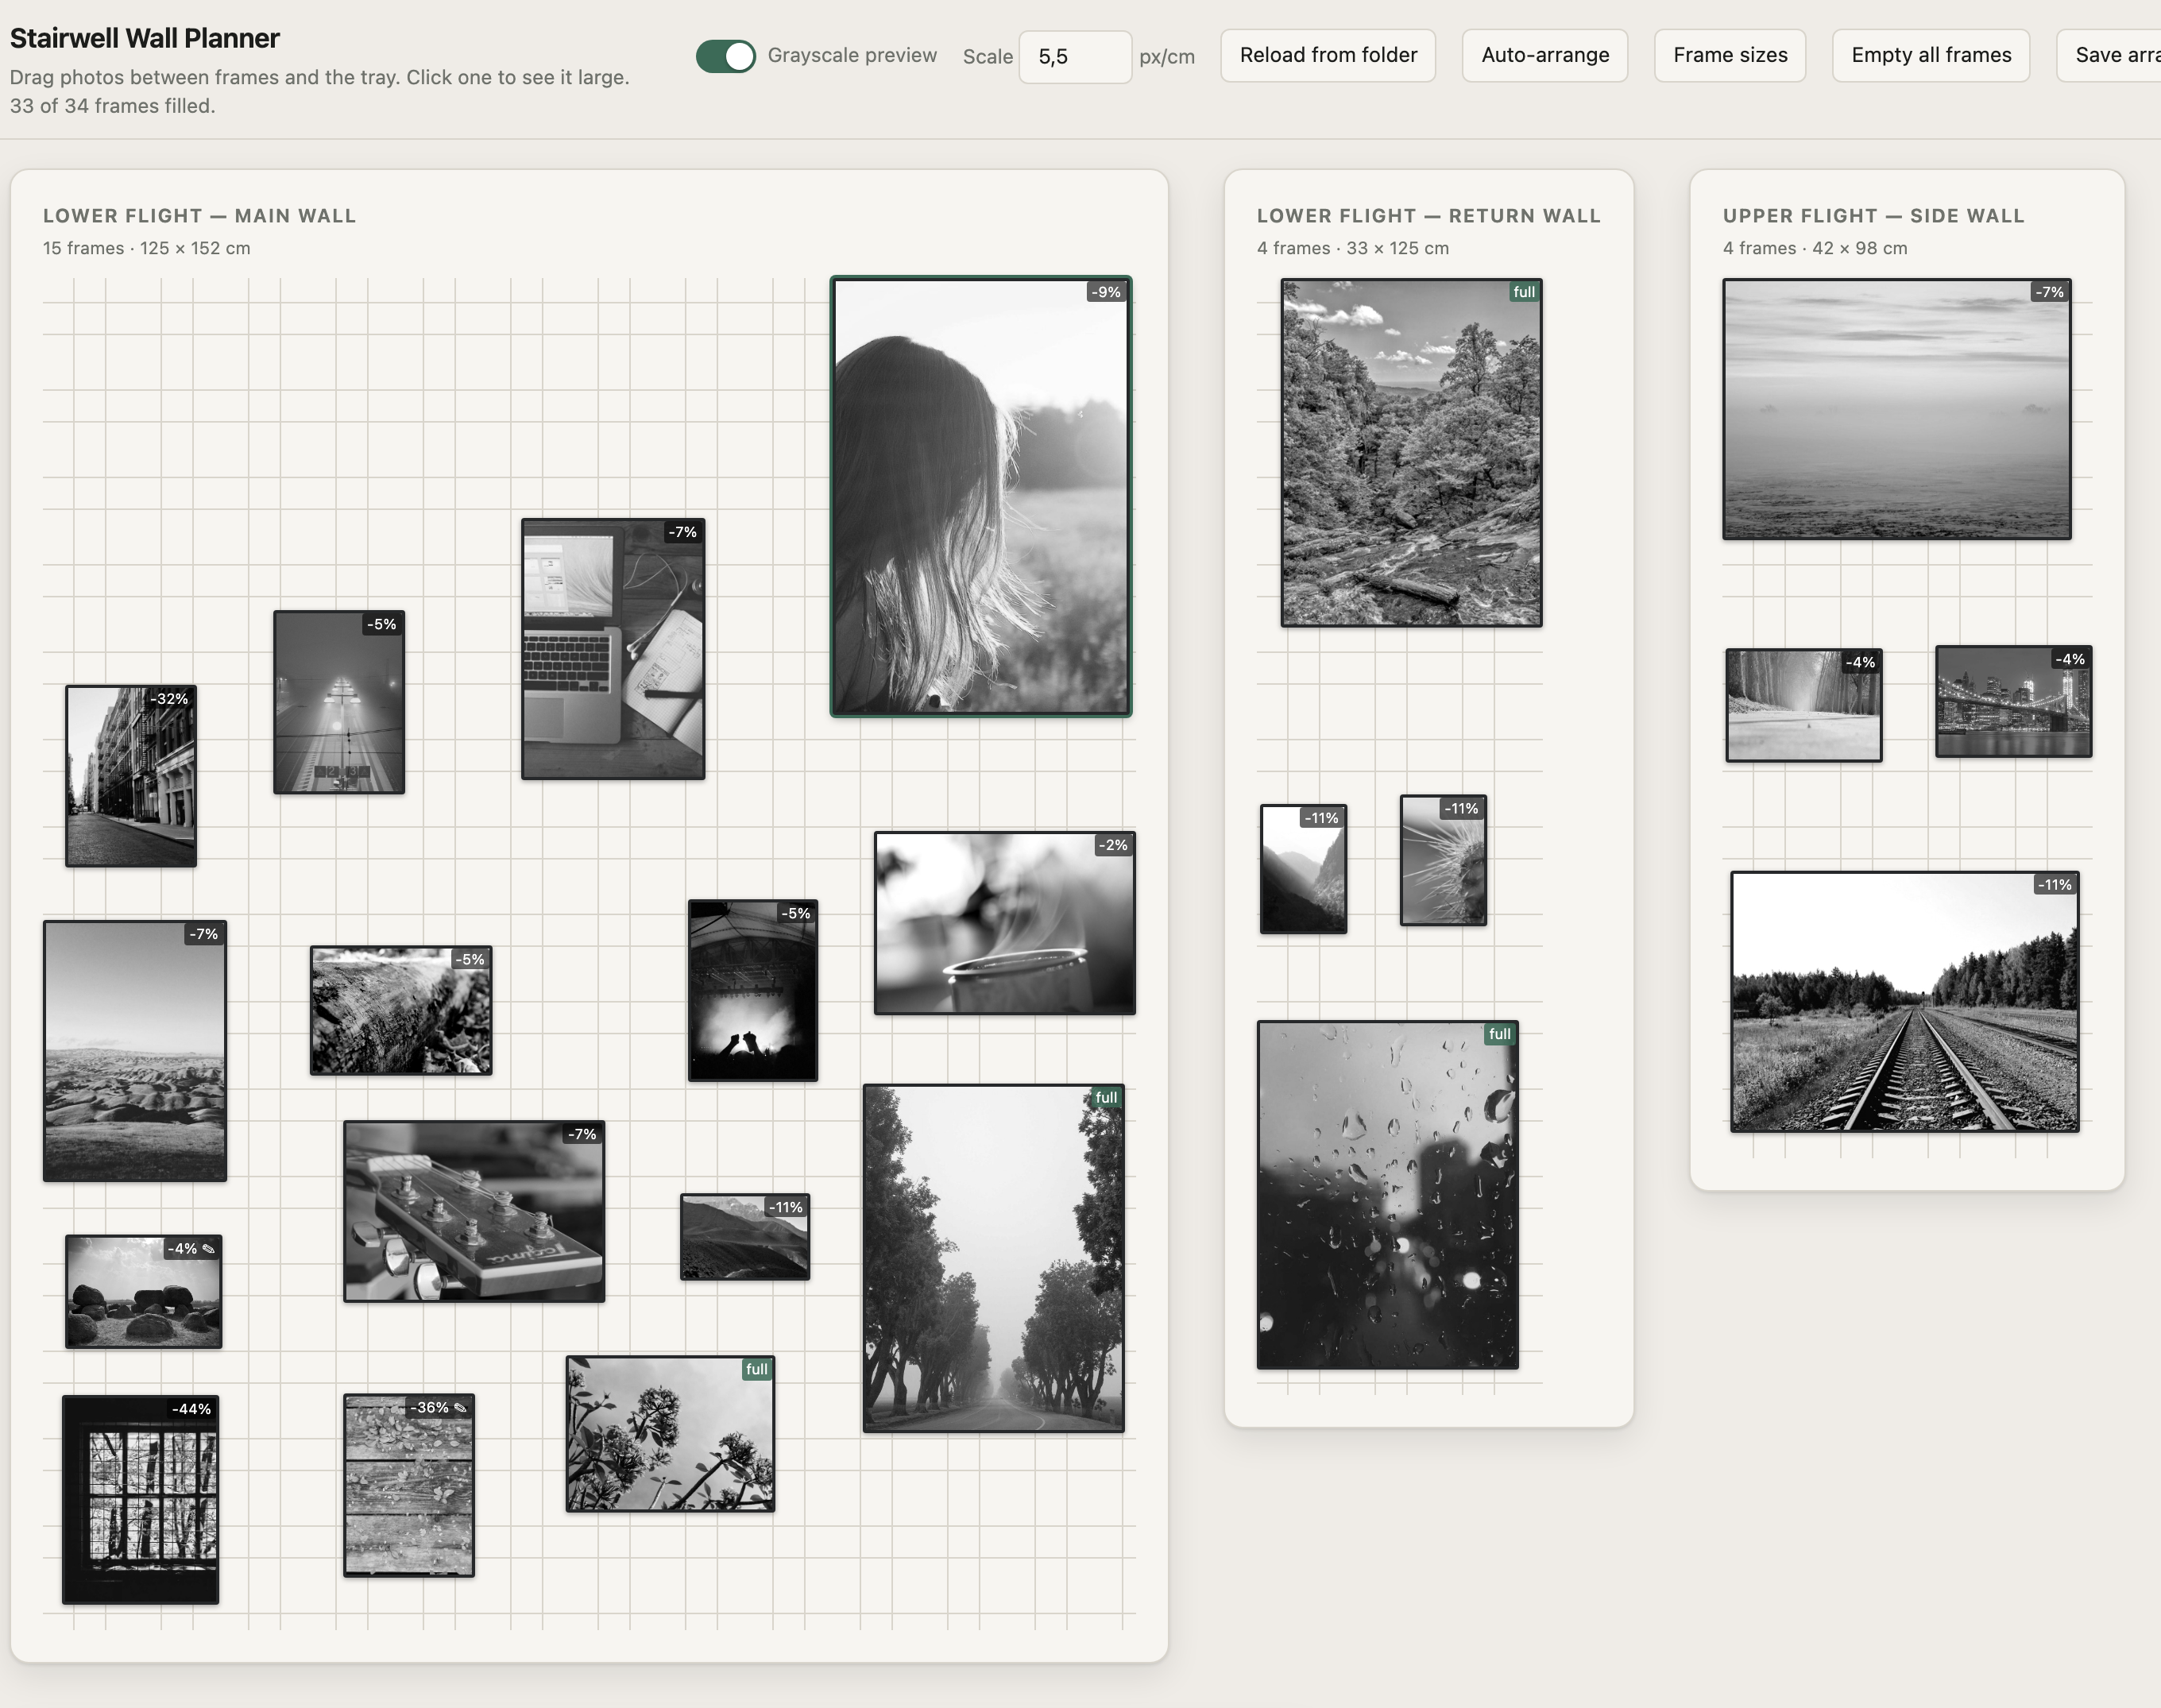
We flipped it on, we flipped it off, we flipped it on again. Black and white made the wall calmer and quieter; colour kept the beach blue and the birthday cake pink. In the end we chose colour, and the point is that we chose it looking at the wall, not imagining it. A question that had stalled the whole project was settled in an evening, and it cost nothing. The switch also does something else: with the colours gone you stop looking at individual photos and start seeing the arrangement. A dark one next to a bright one. Two faces looking the same way. A big landscape calming a busy corner.
The crop that knows where the faces are
Photos and frames almost never share a shape. A phone photo is 3:4. A 15×21 frame is close to 2:3. A 30×40 is 3:4 again. Something has to be cut, and if you’ve ever ordered prints online you know what happens: a centred crop that takes the top of someone’s head.
The planner crops each photo for the frame it’s in, and it has looked at every photo first. It knows where the faces are, and it never cuts through a face that is whole in the original. Each frame carries a small badge with the cost: “full” means a perfect fit, “-9%” means a sliver of sky is gone, “-44%” means a landscape photo is being asked to live in a tall frame, and maybe you should reconsider.
Click a frame and you see exactly what will be printed, at full size. Press C and the whole photo appears, with the kept part inside a dashed box. Drag the box. Let go. The wall updates.
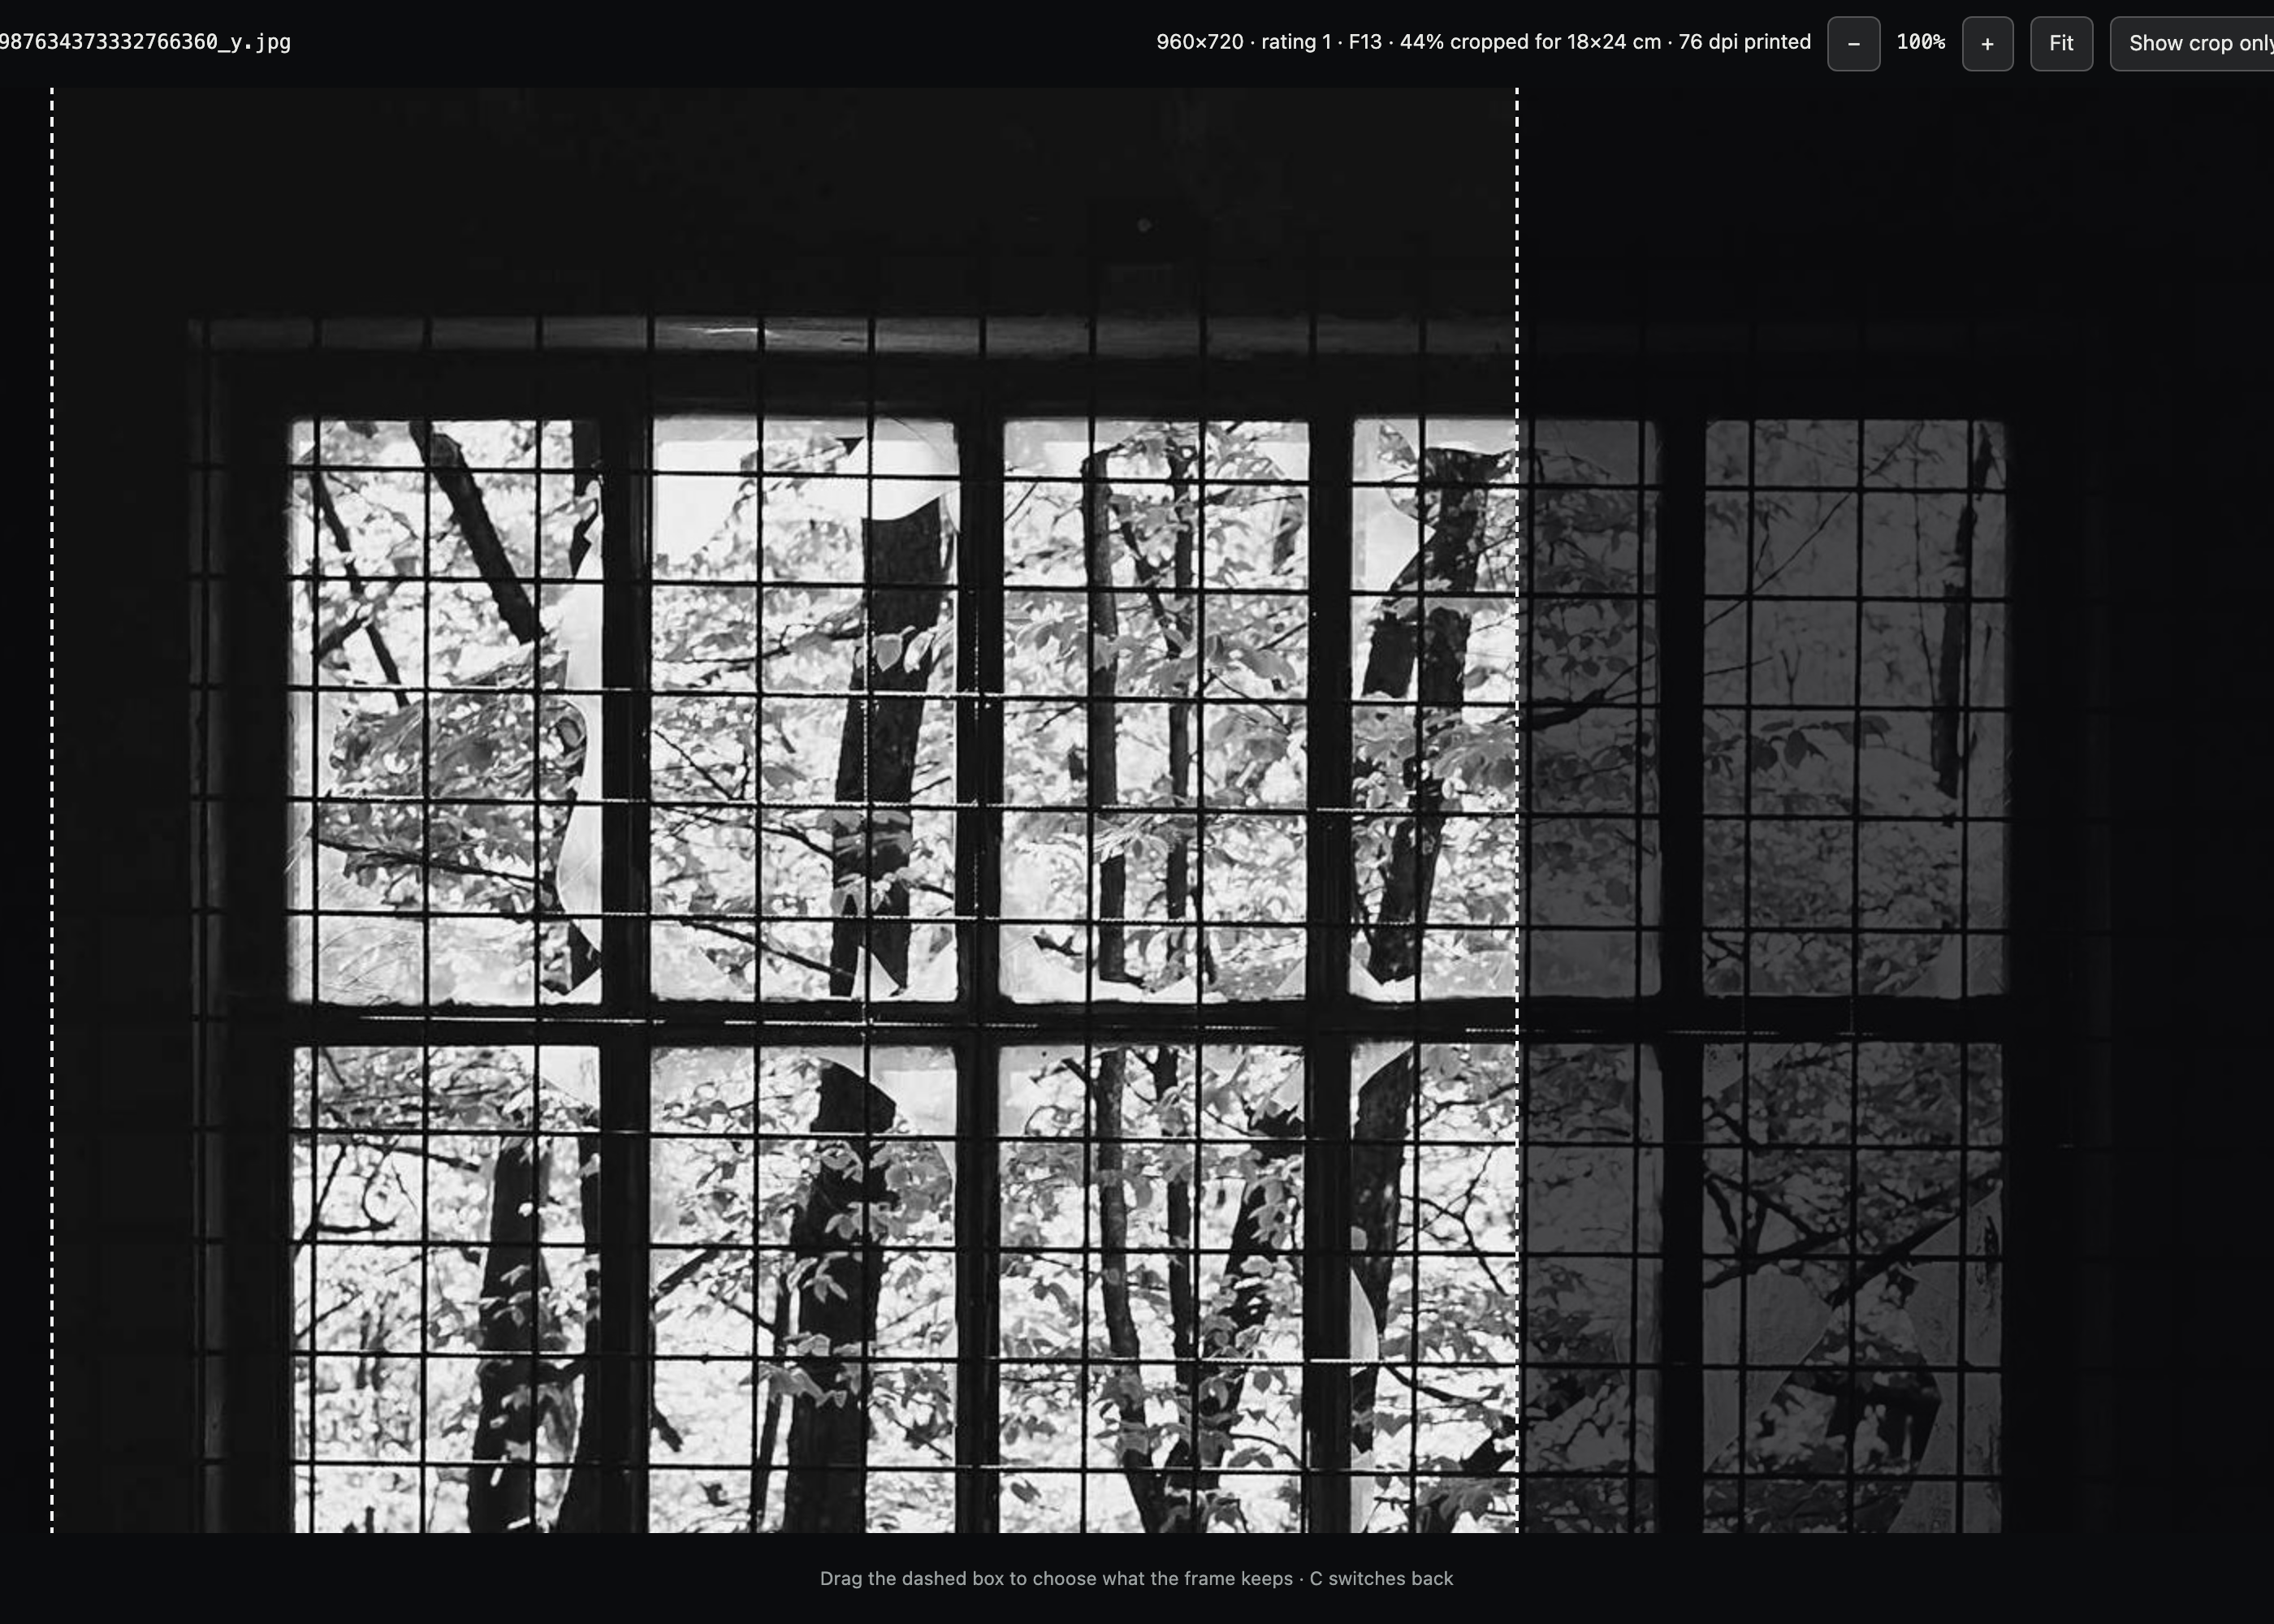
That dpi number is the planner being honest with you. Many of our photos came through a messaging app years ago and are 960×1280 pixels, which is plenty for a phone screen and not much for a 30×40 print. The planner marks anything under 150 dpi, so the disappointment happens on the screen, where it’s free, instead of at the shop.
Let it make the first draft
You don’t start from an empty wall. Before any of this, the agent looked at all 42 photos and rated them from 1 to 6, with a photographer’s eye rather than a formula: the first attempt scored sharpness, and ranked the three professional shots last because of their soft backgrounds. It also learned a rule we wouldn’t have thought of: a photo where the people are small belongs in a bigger frame, or they vanish.
Press Auto-arrange and the best photos go into the biggest frames, portrait to portrait, landscape to landscape, and only where the photo has the pixels to fill the frame. It is a first draft, not a verdict. We kept about two thirds of it and moved the rest by hand, which is exactly the right amount of work: the machine does the sorting, you do the taste.
Walk into the copy shop with two PDFs
When the wall looked right, one button cropped every placed photo for its frame and wrote them into folders by paper size, with a list of what goes where. Then a second step packed them onto A3 sheets: every photo at its exact frame size, turned sideways when that saves paper, a 3 mm gap between them for the scissors. And because “exact” is a strong word, it rendered every page back into an image and measured each photo. All 34 within a quarter of a millimetre.
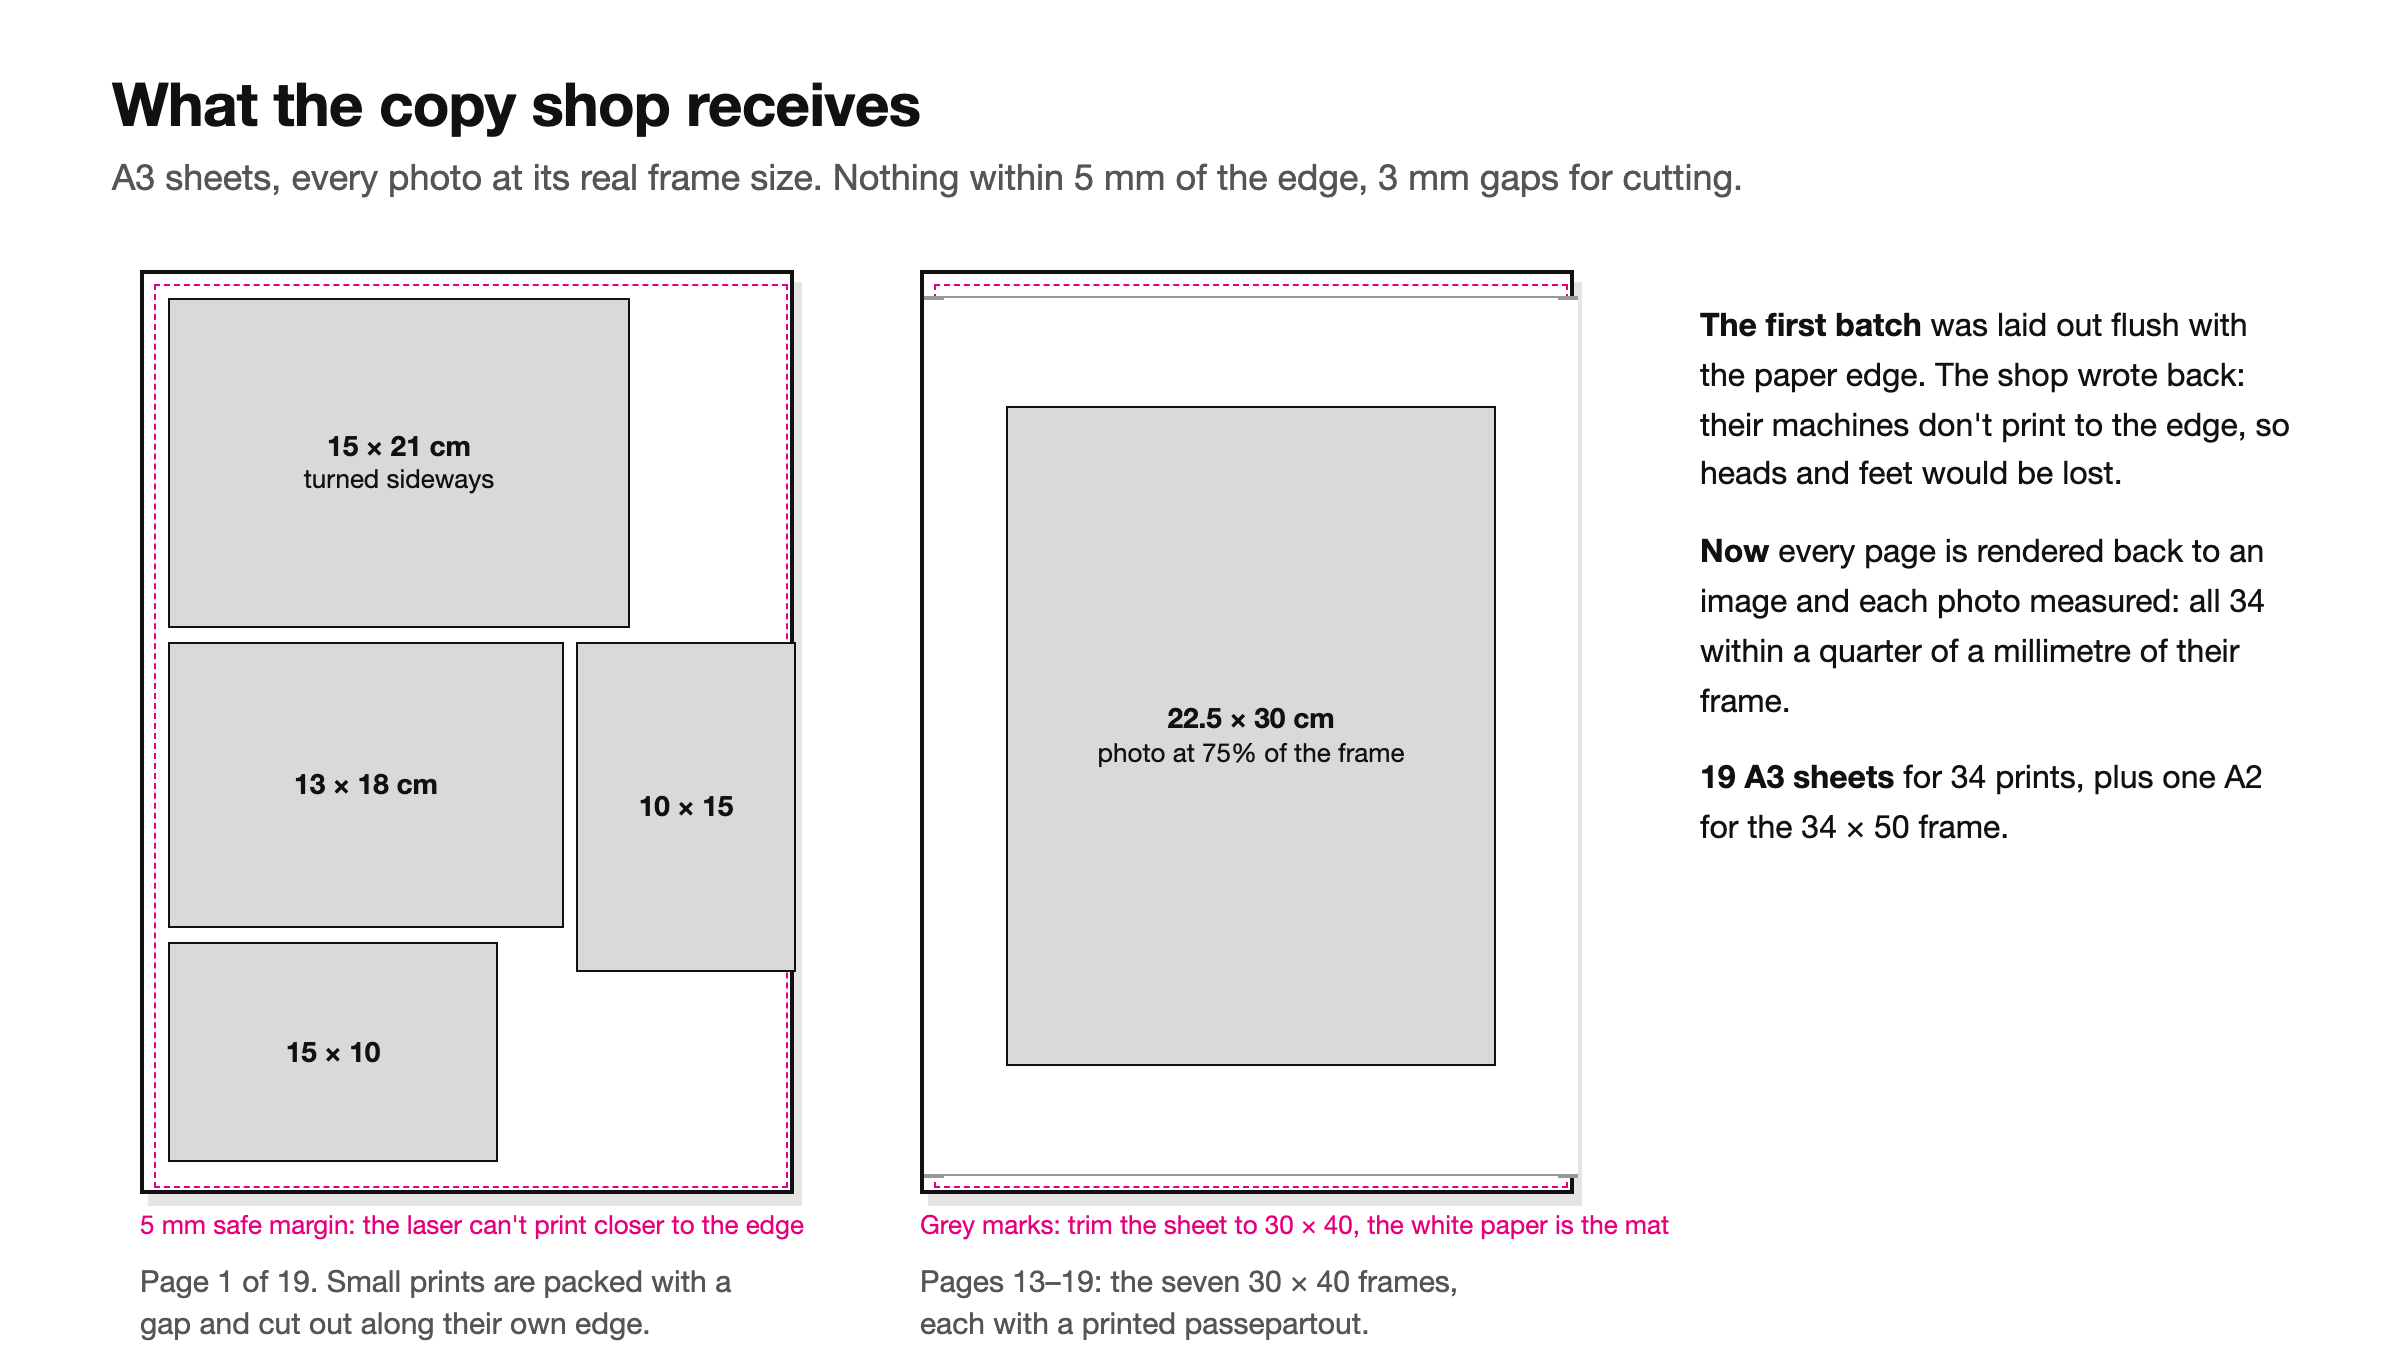
You hand over two files. You get back a stack of sheets, a pair of scissors’ worth of work, and 34 prints that fit.
What the paper taught us
Almost. Three things only the real world could tell us, and all three went back into the planner the same day:
- Laser printers don’t print to the edge. The shop wrote back before printing: my pages were laid out flush with the paper, and heads and feet would be lost. Now nothing sits within 5 mm of the edge.
- Measure your frames with a ruler. Four frames we had down as 12×18 were 13×18. One centimetre, four prints that didn’t fit. The planner changed the size everywhere and re-cropped those four from the originals in a minute; the trip back to the shop took longer.
- A 30×40 photo on an A3 sheet is a bad idea, because A3 is 297 mm wide and the frame is 300. The answer turned out to be prettier than the problem: a printed passepartout. The photo at 75% of the frame, centred, the white paper as the mat, and grey marks for the shop to trim the sheet. On low-resolution photos it even looks sharper.
And one small thing: everything printed darker than it looked on screen, so the reprints are lightened by 20%, in the PDF only. The files themselves stay as they are.
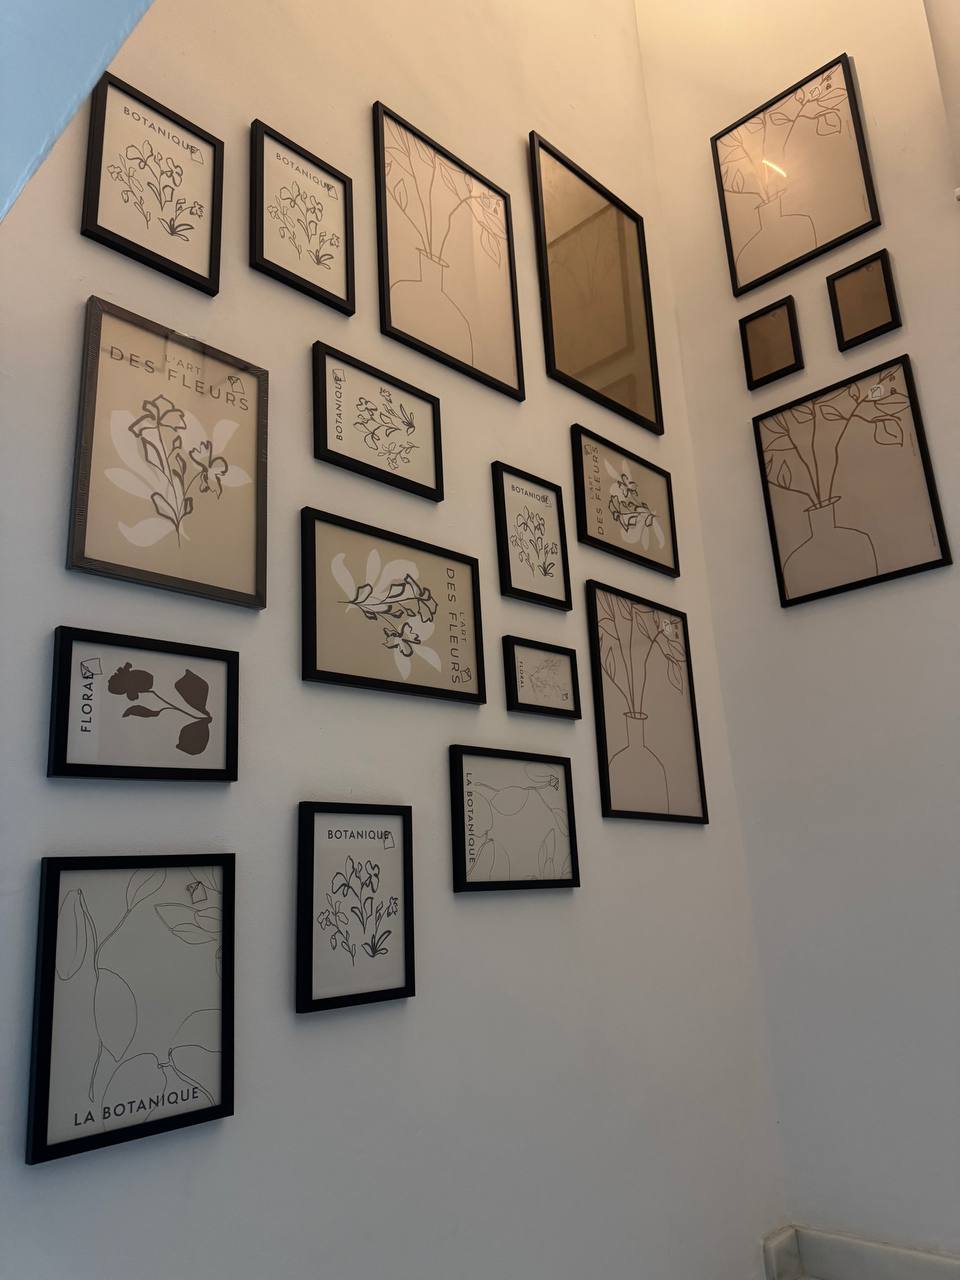
Your wall
Here is what this takes, honestly:
- a folder of photos, in whatever state they’re in;
- a ruler, and ten minutes measuring your frames and roughly where they hang. Approximate positions are fine. You’re judging the arrangement, not the plaster;
- Chrome, because the planner is a single file that opens from the folder and renames your photos for you;
- a Claude Code session and one afternoon. Ours was usable after an hour; the rest was refinement as we used it.
Nothing leaves your computer. The photos, the face detection and the cropping all happen on your own machine, which matters when it’s your family on the wall.
Two limits. Resolution: about 14 of our 34 frames print under 150 dpi, and no software fixes that. If the originals exist somewhere, on an old laptop or in a cloud account, dig them out first; it’s worth more than anything in this post. And the planner shows an arrangement, not a survey. For deciding what goes where, that’s all you need.
The frames are up with the first prints. Thirteen reprints are on their way, and then the botanical drawings go in a drawer for good.
For the technically curious
- One HTML file, no dependencies. Frames come from
frames.csv; photos, ratings and face boxes fromphotos.csv, built by a small Python script. Face and body detection runs once, locally, with Apple Vision from a Swift command-line tool. - The crop follows the frame. The first pass cropped everything to 2:3 before the frames were known and lost 11% of the 3:4 photos for nothing. Now the originals stay untouched and the crop is a rectangle computed per frame with a face-aware offset. The same function draws the preview and writes the print.
- Renaming from a web page uses Chrome’s File System Access API: grant the folder once, and the page renames in place. The record (
assignment.csv) is written before the rename loop, after a first version renamed 25 files, threw, and reported success. - The filename is the only truth.
F07_…jpghangs in frame 7; no prefix means not on the wall. Carrying placements over from an old inventory brought removed photos back. - Tainted canvas. Chrome gives each
file://image its own origin, so drawing it into a canvas blocks reading the pixels back. Reading the bytes through the granted folder handle fixes it. Photos that already fit are copied byte for byte; only cropped ones are re-encoded. - Grayscale goes through a ColorSync gamma 2.2 gray profile, not channel averaging, so skin and skies don’t go flat. In the planner it’s preview only; the prints are whatever you decide, and ours are colour.
- The PDFs use Pillow: JPEGs embedded without re-encoding, MaxRects packing with rotation, 5 mm margin, 3 mm gaps, and a self-check that renders each page and measures every photo. The 34×50 goes on A2 with its passepartout.
No comments yet